Setting Up Harbor with Let's Encrypt and Cloudflare Tunnel on Ubuntu

Search for a command to run...
No comments yet. Be the first to comment.
Security dashboards are lying to you. That critical CVE flagged in your dependency scan? Odds are, your application never touches the vulnerable code path. The result is alert fatigue, wasted engineer

Introduction This document provides a step-by-step guide to installing and configuring the AWS CLI and Pulumi on Ubuntu 24.04. Prerequisites Ubuntu 24.04 installed and configured. A user account with sudo privileges. An active AWS account. 1. In...

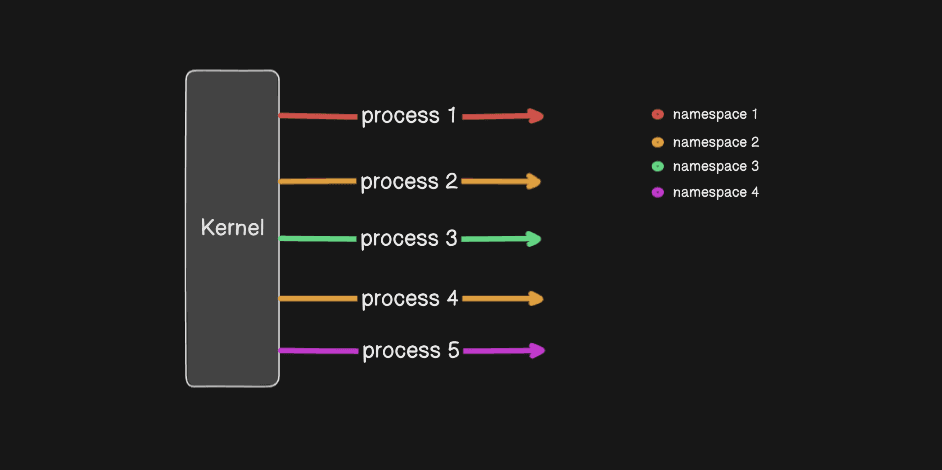
What motivated me to do this? While reading the book Container Security, a strange question popped into my head. Since everything inside a container is essentially a process running on the host machine's Linux kernel, what about creating nested conta...
Introduction This document outlines the procedures for creating AWS Access Keys for both IAM users and IAM Identity Center (Federated) Users. These credentials are used for programmatic access to AWS services, enabling applications and tools to inter...

Harbor is an enterprise-class private container registry with advanced features like RBAC, replication, vulnerability scanning, and more. In this guide, we'll set up Harbor on a Ubuntu machine, secure it with Let's Encrypt certificates, and use Cloudflare Tunnel for the HTTP-01 challenge.
Make sure you meet the following requirements:
Ubuntu 24.04
Publicly resolvable domain (e.g., harbor.kcnaiamh.com)
Access to your Cloudflare account
Root privileges or sudo access
Docker engine version 27.5.1
Docker compose version 1.29.2
sudo apt update && sudo apt install -y curl git unzip apt-transport-https ca-certificates gnupg lsb-release jq docker.io docker-compose openssl tar certbot
cd ~
curl -s https://api.github.com/repos/goharbor/harbor/releases/latest | grep browser_download_url | cut -d '"' -f 4 | grep '\.tgz$' | tail -1 | wget -i -
tar xf harbor-online-installer-v*.tgz
cd harbor
harbor.yml Configurationcp harbor.yml.tmpl harbor.yml
Edit the following fields in harbor.yml:
hostname: harbor.kcnaiamh.com
https:
  port: 443
  certificate: /etc/letsencrypt/live/harbor.kcnaiamh.com/fullchain.pem
  private_key: /etc/letsencrypt/live/harbor.kcnaiamh.com/privkey.pem
You need to specify your own subdomain here.
You can run the following command to change the required filed without opening the file. Also, don't forget to change harbor.kcnaiamh.com to your own subdomain.
sed -i 's/^hostname: .*/hostname: harbor.kcnaiamh.com/g' harbor.yml
sed -i 's/^http:/# http:/g' harbor.yml
sed -i 's/^  port: 80/  # port: 80/g' harbor.yml
sed -i 's|^  certificate: .*|  certificate: /etc/letsencrypt/live/harbor.kcnaiamh.com/fullchain.pem|g' harbor.yml
sed -i 's|^  private_key: .*|  private_key: /etc/letsencrypt/live/harbor.kcnaiamh.com/privkey.pem|g' harbor.yml
⚠️ Don’t run
install.shyet — we need the certs first.
If you have dedicated public IP address from your ISP then you don't need this step.
Install cloudflared:
If you don’t have cloudflared installed on your machine, run the following:
# Add cloudflare gpg key
sudo mkdir -p --mode=0755 /usr/share/keyrings
curl -fsSL https://pkg.cloudflare.com/cloudflare-main.gpg | sudo tee /usr/share/keyrings/cloudflare-main.gpg >/dev/null

# Add this repo to your apt repositories
echo 'deb [signed-by=/usr/share/keyrings/cloudflare-main.gpg] https://pkg.cloudflare.com/cloudflared any main' | sudo tee /etc/apt/sources.list.d/cloudflared.list

# install cloudflared
sudo apt-get update && sudo apt-get install cloudflared
Setup cloudflared service:
After you have installed cloudflared on your machine, you can install a service to automatically run your tunnel whenever your machine starts:
sudo cloudflared service install eyJhIjoiNGM1MTIxNmFhNGU2MTU0NWM4OGUxMjExMDk3YTNjNWYiLCJ0IjoiODIyZjU0ZjYtMmRlNi00NjNiLWEzZDYtYzdkOWUxMDAxZTkzIiwicyI6Ik16aGhOMlpsWmpNdE5UUXpNeTAwWW1ZMUxXSmxPRE10TW1Rd1lqVTRZamxsWVdSaSJ9
You will get the token when doing the tunnel setup.

Since HTTP is tunneled through Cloudflare, Certbot's default HTTP challenge will work.
sudo certbot certonly --standalone --preferred-challenges http -d "harbor.kcnaiamh.com" --agree-tos -n -m "naim@gmail.com" --keep-until-expiring
Change subdomain and email address according to yours.
Certs will be saved under:
/etc/letsencrypt/live/harbor.kcnaiamh.com/
sudo ./install.sh --with-trivy
Harbor should now be accessible via:
https://harbor.kcnaiamh.com

Default credentials:
Username: admin
Password: set in harbor.yml (Default pass: Harbor12345)
Create /etc/systemd/system/renew-harbor-cert.service:
[Unit]
Description=Renew Let's Encrypt certs and restart Harbor
[Service]
Type=oneshot
ExecStart=/usr/bin/certbot renew --quiet
ExecStartPost=/opt/harbor/prepare
ExecStartPost=/opt/harbor/install.sh
Create the timer /etc/systemd/system/renew-harbor-cert.timer:
[Unit]
Description=Timer for cert renewal

[Timer]
OnCalendar=weekly
Persistent=true

[Install]
WantedBy=timers.target
Enable it:
sudo systemctl daemon-reexec
sudo systemctl enable --now renew-harbor-cert.timer
To delete the certificate, run the following command:
sudo certbot delete --cert-name harbor.kcnaiamh.com
Using Cloudflare Tunnel with Let's Encrypt offers a neat workaround for systems behind NAT or without public IPs. Combined with Harbor, this makes a secure and professional-grade private registry feasible on even home labs.
If you're using Harbor in production, consider:
Enabling RBAC & LDAP
Enabling replication for DR